Sunday 4 September 2016

Back to basics - Whitewashing

When confronted with an abundance of products when it come to masonry paints it can be quite confusing, especially when you are working in an older property without damp proofing and you would like to allow the masonry to 'breathe'.
It was for this reason that we decided to go with traditional whitewashing.  Whitewash (lime and water) can be easily prepared at home.  Lime wash besides being breathable has certain advantages namely:

  • very cheap to prepare
  • has fungicidal activities 
  • seems to deter wood bring beetles
  • does not contain petrochemicals and is therefore greener
Disadvantages include:
  • difficulty in matching different batches so mix all you need in one go
  • can rub off on clothing
  • may need a new coat every few years


Preparing the whitewash
Needs list:
Clean bucket, lime, drill with mixing paddle, water, gloves, eye protection, respirator.

Lime (gir) can be easily bought from most ironmongers.  It must be mixed carefully as it is caustic (will burn), so gloves, eye protection and a respirator are essential.

  • mix the lime to the water not vice versa, this will reduce airborne lime dust (even though you should be using a respirator).  Use the drill and mixing paddle for this.  Keep the revolutions low so as not to raise a cloud of lime dust.  Mix until the mixture has the consistency of milk
  • Close the bucket and leave it for a few hours.


Applying lime wash
Lime wash cannot be applied to any surface.  In our case it was limestone which is a suitable substrate.
Needs list:
Safety gear as above, paintbrush, spray gun, brush, stirrer

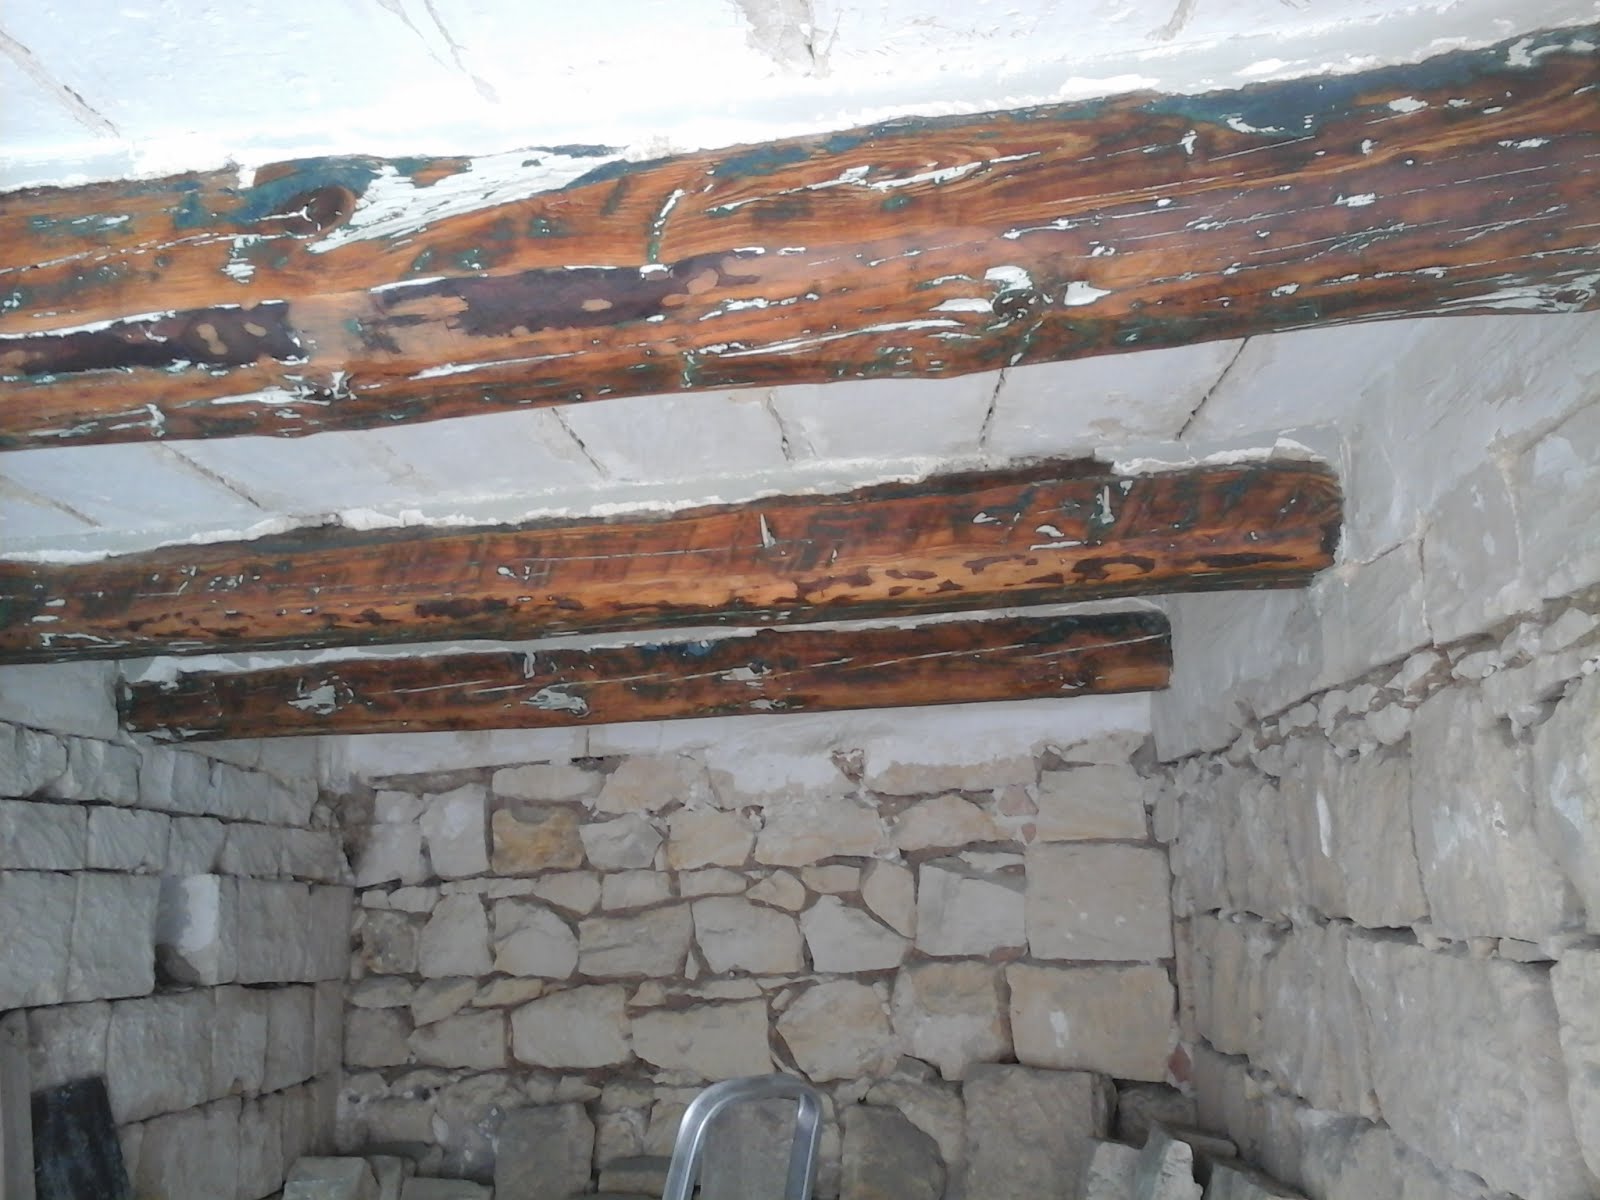
Ceiling prior to painting


  • the surface to be painted (in our case a limestone slab ceiling) should be brushed to remove any loose particles and dust
  • the area should be sprayed with water (lime wash should always be applied to a moist surface).  Spray the surface as you go along as (dependent of weather conditions) it may dry out fast.  I used a spray gun with an adjustable nozzle set to a fine mist.
  • all that is left is to apply the wash with a brush.  Do not apply thickly.  At first it will seem as if you have barely covered the surface but with a few hours the colour will come through.  The paint was stirred at intervals during the process.  A second coat can be applied. I applied this after 24 hours, however the surface was moistened again in the same manner.
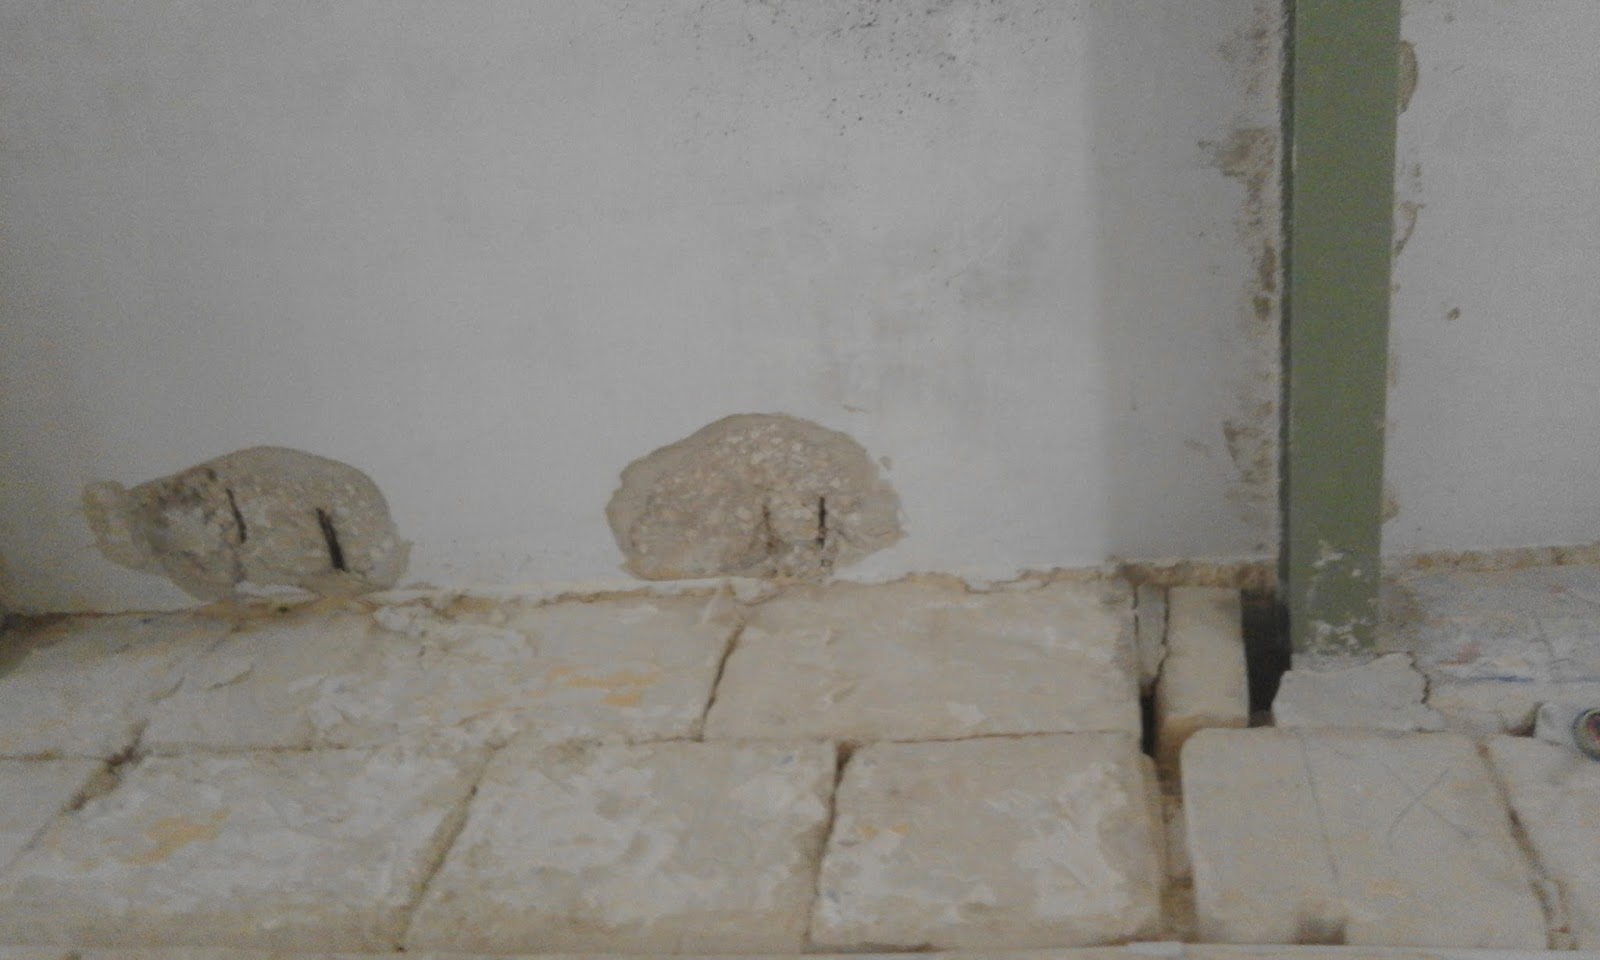
After 2 coats


Monday 22 August 2016

Make your own flagstones

This project started off as a minor project to fabricate a few stepping stones for the garden.  There was some minor trial and error, however the results were surprisingly interesting.  In fact they were so interesting that we decided to use them indoors for another part of the house.  I will describe what worked best for my purpose.

Making the mould:

Needs list - wooden strips approx 2 to 2.5cm high, wooden sheets at least 1cm thick ( melamine covered chipboard worked best for my purpose), drill with drill bits and screwdriver attachment, screws, trisquare.
Melamine board ready to be cut down to size

Fitting the lateral strips


It all starts off with deciding on the size of flagstone.  Cut the wooden sheet slightly larger than the size of the flagstone to allow attachment of the wooden strips on the sides as borders.  
E.g. for a 50 cm square flagstone cut the sheet about 55 cm square (better slightly larger).   The extra width it to accommodate the width of the lateral strips.

Cut a 50 cm wooden strip and screw down to one edge.  Mark out 50 cm from the inside of the strip at 90 degrees to the 1st strip using a trisquare, and attach another wooden strip.  I kept the strip in place with F clamps to drill guide holes for the screws.  These were drilled through the underside of the wooden sheet into the clamped strips.  
This was done all around to create a box with an internal measurement of 50cm square.

All that is left was is to mix up a batch of concrete and pour it into the mould.  I used a ratio of 1 cement: 2 sand: 3 gravel.  I did not make a runny concrete mixture.  It was relatively stiff but fluid enough to fill the corners and edges of the mould.  A waterproofing concrete additive was also added to the mix. The mixture was poured in a bit at a time and a wooden block was used to compress it into the corners and sides of the mould.  After the mould is full, use a hammer to tap all around the sides and corners of the mould to encourage the concrete to fill all the mould.  The exposed concrete surface of the mould was left rough to create a good key for the laying mortar to grip onto.
Exposed surface in mould was left rough.  This will be the underside of the flagstone.


 This is left to set.  After 24 hours 2 of the sides of the mould are unscrewed .This is where the drill with screwdriver attachment come in handy.  Remember that this process will need to be repeated for every slab made.  Your drill will need a reverse switch to undo the screws.  A few gentle taps on the mould with a rubber mallet should release the slab.  No release agent was used ( a release agent can be applied prior to filling the mould to allow the slab to release easily).  I found that used of melamine boards allowed the slab to release without the need of this.  It also created a very smooth surface.
The finished product.  Slabs with small defects or chips were left for cutting down to size such as close to walls.

The slabs can be left to cure for a few days.  If not mistaken there is a 28 day curing time for this concrete, however I started to lay them after 1 week.  

Make no mistake even though making the first few may be fun, this is an extremely labour intensive process.  Check your square area before you decide if you would like to undertake this. 
The laying is done in the same way as the process mentioned for:Re- laying old cement tiles
However keep in mind a 20cm square tile is much lighter that a 50cm square concrete one.

Sunday 14 August 2016

Applying paint

The following are the processes I use for application with brush.

New wood:

  1. Fill any imperfections with filler (unless this is an old piece and you would like to retain its character / history)
  2. Sand down
  3. Wipe down to remove dust
  4. Apply 2 coats of undercoat
  5. Apply top coat
Previously painted wood:

  1. Remove flaky paint with sander / scraper
  2. It is up to you whether you would like to sand down to wood.  I prefer this option.
  3. Use wood filler if you deem necessary and sand again
  4. Follow steps 4 and 5
Note:  There are times when I feel that the top coat is not perfect that I opt for more coats of finish.  However for every subsequent coat the surface needs to be sanded down lightly to create a key for good adhesion of the paint.  For this process I prefer to use a wet and dry sanding, and sand down until the sheen of the paint any any minor imperfections such as paint droplets are removed.

Steel:

Untreated steel:

  1. New steel may have a layer of oil.  This is easily removed with thinner / acetone.
  2. Any rust may be removed with a wire brush or sandpaper
  3. Apply a coat of primer
  4. Apply undercoat
  5. Apply topcoat
Note:  Some products may be applied directly to metal surfaces without primer, even with a bit of surface rust, however it is always recommended to remove the flaky rusty bits.

Galvanized steel:

  1. Apply a mordent to the steel surface to allow the paint to adhere properly
  2. Follow steps 4 and 5 for untreated steel above
Some paint systems allow for application of paints direct to galvanized steel.

After the jobs done:
Clean your brushes according to the instruction on the can.  Dispose of paint correctly.

Cleaning and repainting of old beams

Wooden beams add loads to character to a house especially when cut by hand.  One small room had a few of these which were coated in various layers of paint.  The ceiling of this room also had some minor water ingress, and signs of woodworm were present.  We decided to take the beams back to bare wood, treat them for wood worm and use a wood preserver and repaint.

Needs list
drill with sanding disc, sandpaper of various grit sizes, paint brushes, wood preserver, wood worm treatment (sometimes these come together in one product), syringe (for injecting into the woodworm holes), googles, dust mask, sander, paint, used,clean food tins, thinner ( for cleaning brushes)

Attention:  Ventilate the room as much as possible during the sanding / scraping and painting stages.  

Together with the architect and builder we ascertained that these beams were structurally sound.  There is no point in doing all that work to have to eventually replace them.

Stripping the paint
The paint was dry and cracked.  I started the process with a 40 grit sand paper.  I found that the drill with a sanding disc worked well.  The minor circular marks will disappear once you reduce the size of grit and shift to using a sander.
Beams before
This was an easy one the paint came of easily, however make sure that you are wearing your goggles and mask, as a lot of fine dust as well as paint chips will fly.

Beams after paint removal using rough grit
Sanding down

Using a sander (goggles and mask) the beams were sanded down gradually using finer grit.  This helps remove any tool marks left from using the drill sander.  Personally I do not think that you have to strive for too fine a surface as they are there for character.  The imperfections are also part of the history of the beam anyway.  Sanding however gives the surface a good key for paint.

Treating the wood
Had the beams not been  already in place, I would have sent them off to a fumigation chamber for treatment, however in my case this was not possible.  
For this process an all in one wood preserver was used.  To avoid dipping the brush directly into the storage container, pour an amount of wood treatment into a clean tin can.  Then  apply generously by brush.  I also like to inject any woodworm holes I see using a syringe.
This is then simply left to dry.  Personally I gave 5 or 6 applications over the course of a few months.

Painting

The beams were to be repainted in a white paint.  It is important to removed as much dust as possible from the surroundings by sweeping / vacuuming and washing the floor prior to works.  This will avoid disturbing any dust which will stick to fresh paint.   First they were wiped down with white spirit to remove as much dust as possible.  Using a brush a first coat of undercoat was given.  On drying ( always see drying and re-coating times on your product) a second coat of undercoat was given.  This was followed by a couple of coats of top coat (finish).
Sanding is not necessary between undercoats, however if more than one coat of finish is given it is wise to sand lightly between coats to create a key (i.e. the surface will allow better adhesion of the subsequent coat).

Form more about painting click here:
http://diditmyselfdiymalta.blogspot.com/2016/08/applying-paint.html


First application of undercoat

After 2 coats undercoat and 1 coat top coat


Monday 8 August 2016

Repairing a reinforced concrete ceiling

Being not maintained for a number of years, one of the roofs had lots of vegetation growing around the borders and had lost much of its waterproofing properties.  With every rainfall water seeped in to the concrete ceiling below causing parts of the steel mesh to rust and crack parts of the ceiling.

We first made sure that the ceiling was still structurally strong (involving an architect).  After  all the necessary work was done on the outside of the roof ( removal of vegetation, new waterproofing etc, we set to work on repairing the concrete ceiling.

Step 1:
Needs list: Hammer, hammer, chisel, impact hammer, wire brush.
Removal of the weak concrete.  Identifying the weak and loose concrete was easy.  A hammer was used to tap along the ceiling.  A hollow sound will identify weak or loose spots.  You may decide to mark these with a pencil.

This cracked area sounded hollow on tapping
Here the steel mesh was already starting to show

 Using a small impact hammer, all the loose concrete was removed around the rusty parts of mesh.  In the process any loose plastering was also removed, in preparation for re-plastering.  It is essential to expose the steel mesh all around to allow for proper treatment of the mesh.


Exposure of the steel mesh all around to allow proper cleaning and treatment of the mesh
At this point once the mesh is exposed it can be cleaned, i.e. all the loose rust is removed by means of a wire brush.

Step 2.
Need list: paintbrush, steel treatment, suitable mortar for repair site, latex gloves.
A metal treatment was used to protect the exposed steel mesh.  This particular product needed to coats with a curing time between 2 applications.  (Always read product specs and only mix what you think you can use in one go).  These 2 applications needed a number of hours to cure.
The steel after treatment.  This image shows how the steel is cleared of loose concrete all around.


The next step is to mix a batch of the repair mortar.  This can be applied by trowel or by hand.  The latter is easier as you need to make sure that the mesh is packed with mortar all around.  (This is where the gloves come in)  Make sure that the mortar is not runny as it will not adhere, and you will have lots of wastage.

All that needs to be done at this stage is to allow the mortar to set.  After this the ceiling can be plastered in the desired finish, together with those areas where loose plaster had been removed.
Repair mortar covering mesh all around

Monday 25 July 2016

Re-Laying old cement tiles

Finally after most of the masonry works were over it was time to re-lay the old patterned tiles.  Having 2 different patterns in the 2 rooms that we opened up to each other, we opted for plain white tiles to fill the voids left by the removal of walls and widening of doors.  Upon calculating the square area and making up for allowances on possible breakages and waste due to complete inexperience in laying tile we were short quite a few tiles.

We managed to find (from more than 1 source) a fair amount of white tiles by using a local recycle site.  Being manufactured by different people at different times (some tiles were rather old), we decided to lay them at random, in keeping with the school of beauty seen in imperfection or randomness.  Being an older property we thought that we could afford this.

Different shades of white to
bridge the gap where
 the wall once stood
Needs list: a long spirit level, rubber mallet, sand, cement,     angle grinder, sponge, brush, knee pads, 3 buckets, drill and mixer attachment, trowel (kazzola) and hawk (flawt) and lots of patience.

My rookie mistake here was to start laying tile without checking if both rooms were level.  It was only half way through the work did I notice that there were various levels in both these rooms.  Getting an idea beforehand is definitely easier and prevents removal and relaying not to mention tile wastage.

Preparing the substrate

The areas which had to be tiled where cleaned, and a fresh substrate of bedding (torba) was laid. The bedding was compacted by hand (being a small area) using a flat piece of wood  and water was sprayed over it to aid settling of the bedding.  The tiles were soaked in water beforehand to allow for a better adhesion and a fresh batch of mortar consisting of fine sand and cement was mixed using a drill and mixer attachment.  The ratio I used was 3 parts sand to 1 part cement.  I found personally that the mixture should not be too soft as the tiles could sink further below the desired level and not too stiff not to allow adjustment.

Here is the laying process in point form:

  1. Prior to laying the edges of the tiles (that were already laid) were gently ground down using an angle grinder.  The edges will have left over mortar and grouting stuck to them.  This allows for good apposition of the newly laid tiles.
  2. Using a trowel apply an amount of mortar relative to the size of tile and slightly higher to the required level of mortar (you may check with the neighbouring tile).
  3. Place a wet tile on the mortar and gently tap around it  starting from the edge closest to the neighbouring tile outwards to allow the excess mortar to move outwards.
  4. Check level with neighbouring tiles throughout the process.  Is tile level?  If level is too low, remove tile and add mortar.  If level is too high remove some mortar and re-lay tile.  If the tile is level move on to the next tile.
Red arrows mark the badly damaged tiles that were replaced
Whilst in the process badly damaged tiles were removed and replaced.  With damaged tiles that were surrounded by others in good condition removal consisted of cutting a grid like pattern into the tile (using a grinder) as well as cutting around the border of the tile.  This approach did not damage any neighbouring tiles.  After lifting out the pieces the edges were ground down using a grinder.  The replacement tile was laid in the same manner above.  The surrounding tiles were used as a reference level.

The edges were left to the end.  In this way broken tiles were used to cut down to size.  The remaining whole tiles were kept as spares.
  
The decision to mix and match different whites worked out well for us.  However that is just a matter of taste.


Edges were left till the end

All that remained was to bring in a professional tile polisher to breathe life back into the tiles.  This is not a job that can be done without the right industrial tools.


Sunday 24 July 2016

Cleaning of old cement tiles

Cleaning needs list:  drill / angle grinder with rough grit sanding discs, metal scrapers /chisels, goggles, dust mask, small pickaxe

The excess mortar and substrate was gently removed by gently scraping with a small pickaxe or chisel. keeping the tile vertical.  The sides and bottom were then cleaned using the sanding discs.  It is important to clean the sides as when re-laying the tiles will not fit together neatly.
ATTN: at this point lots of dust and bits and pieces will fly about so wear protective equipment.
Finally scrape the underside and sides using the metal scraper, and store the tiles for re-laying.
Tile after removal
Drill with sanding disc used for cleaning


Tile after cleaning
Ready for a second chance